The first thing to go was the stock radio/tape deck. At speed with the top down and the wind deflector up, changing speed means you need to change the volume, too (especially with the resonator this car has). Headrest speakers are the answer to this problem. The radio worked fine, but I wanted a CD player anyway.
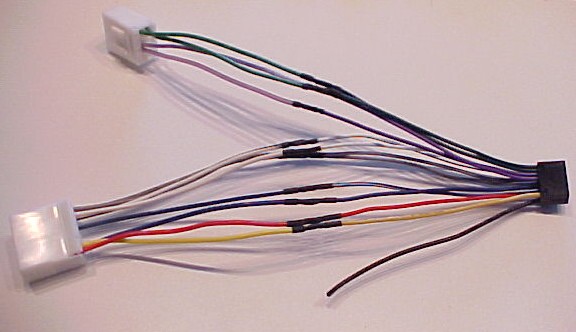
The Miata has cutouts in the headrest for speakers, which were not installed. 3.5" two-way speakers are commonly used in this application. To do the headrest speakers cleanly, a pre-made wiring harness is HIGHLY recommended. I ordered mine (plus a new antenna and some other stuff) from Performance Buyer's Club. The '94 Miata has a half-harness under the seat, so installation is straightforward.
I wanted a one stop shopping experience for the audio gear, so I called Crutchfield, which is not something I do often. Once I explained what I wanted to do, they picked the same components I had selected on the web without me saying anything. In the end, I got:
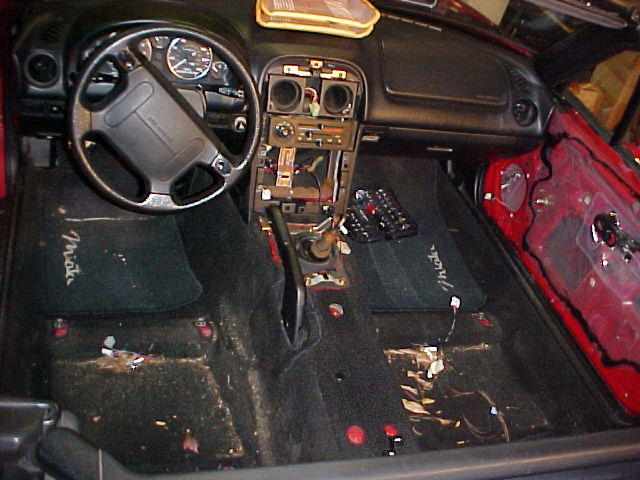
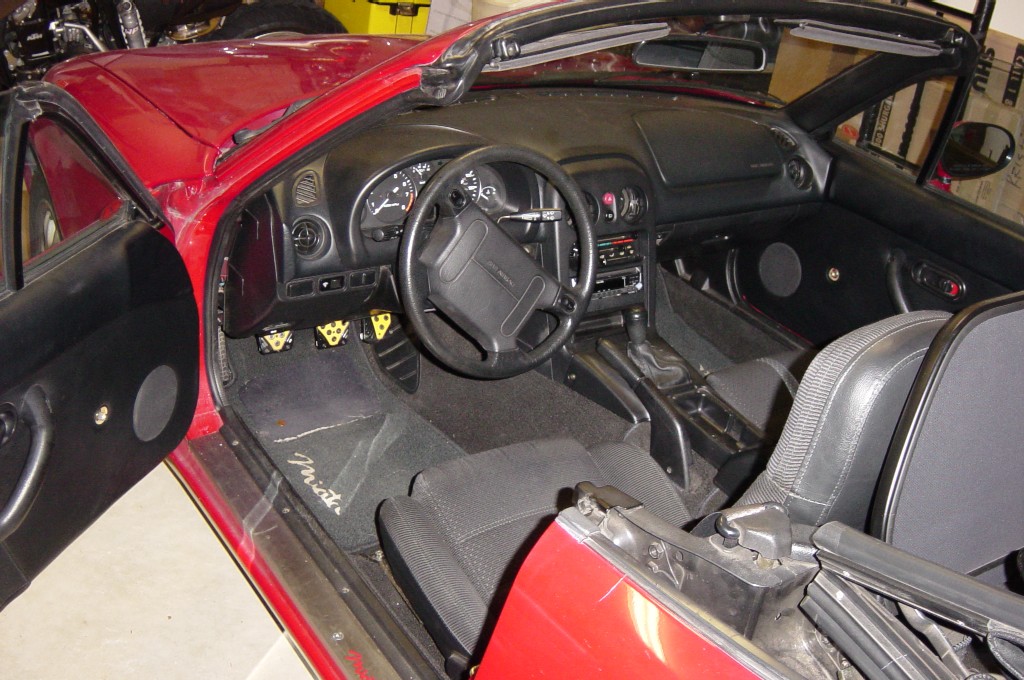
Step 1: Remove the Interior
A service manual and a vacuum are very helpful here, as you can see. Crutchfield's installation sheets were also right on the money for disassembling the interior, but I followed the service manual.
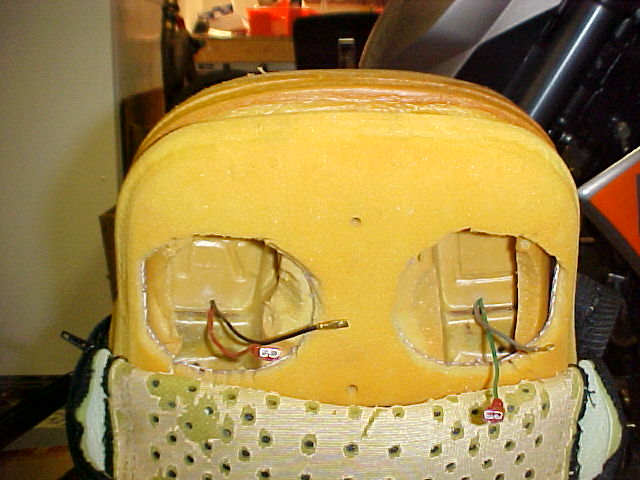
Step 2: Install the headrest speakers
My speakers were pretty deep, so I opened holes in the headrest's plastic insert to allow the drivers to come through a little bit. I also trimmed a little foam to fit the larger drivers. The fit is excellent. The wires come up the back of the seat and in through the seat foam. Leave enough slack so that the seat moves freely to any position and secure with a zip tie underneath.
Step 3: Install the door speakers
Plug the wiring adapter into the factory harness and put the speaker in (duh!). I recommend a little foam around the hard parts to keep the rattles away. I used pipe insulating foam around the connector. You could also zip-tie the adapter to the speaker basket.
Being me, I cut the ends and soldered the new leads on. I also had to drill a new mounting hole in the speaker frame and grind away the flange around the screw heads for a perfect fit.
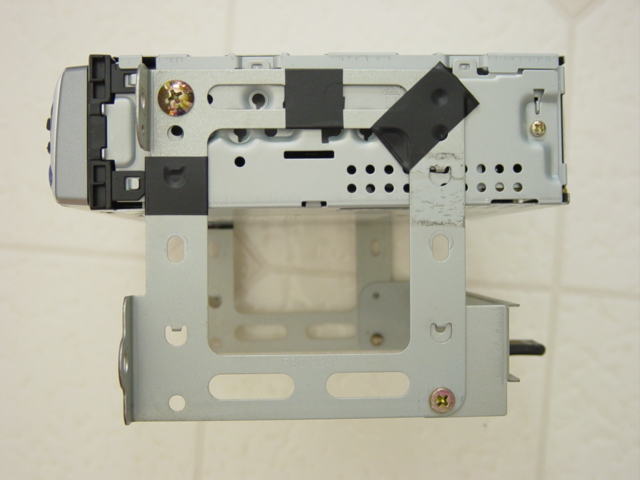
Step 4: Install the head unit
Wire the head unit harness adapter. I did a neat job with a soldering iron and some heat-shrink tubing, which took about half an hour. Crimped connectors will also work, but are not as nice and take up more room behind the dash. The dimmer line (orange with white stripe) is not needed, so I disassembled the connector and removed that wire and pin (yeah, I'm, uh, particular).
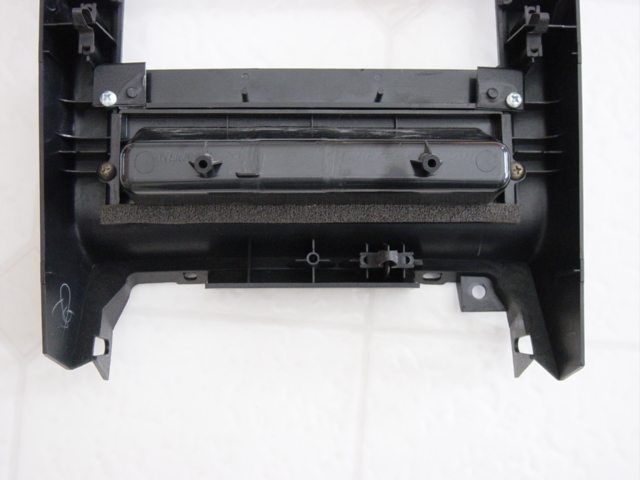
Since I couldn't get a mounting kit that met my high standards, I made my own. I took the stock unit and removed the front inside tabs with a Dremel, then cut slots in the rear of the head unit to accept the rear tabs (WARNING! WARRANTY VIOLATION!). The front holes lined up with the ISO-DIN holes in the head unit, so I secured it there with screws. I added some electrical tape around the frame to eliminate any buzzing by the unsecured sections.
This kit fits, but it leaves about an inch between the bottom of the head unit and the top of the pocket, so I fabricated a spacer using some of the leftover trim from the Metra kit. My dash may not look as good as the Metra kit, but I get to keep the pocket and it fits.
In retrospect, I might have been able to use the bottom half of the Metra kit from the spacer on down, but it would have been secured only by two screws.
Step 5: Test listen
Make sure everything works before you put all the panels back together. Beer is appropriate at this juncture.
Step 6: Put it all back together
Whew!
Parting thoughts
Take your time planning it out and doing the work. Things rarely ever go right the first time, and rushing through it only gives you more time to think about how you could have done a better job. This project probably took me twenty hours to do, but it has absolutely NO rattles or other problems as of the first test ride. I don't have to go back and do anything over, nor do I want to.